There is an excellent article to describe the procedure on how to configure it on Web Interface and clients here. But I decide to write a complete guide based on my practice.
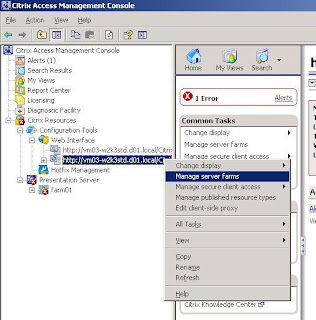
1. Create a PNA site on the Web Interface in the Access Management Console
- Start the Create Site wizard
 - Select XenApp Services as the type of the site!
- Accept the default settings for IIS Location (/Citrix/PNAgent) unless you want your own URL, for example /PNA)
- After the site is created successfully, you need to configure it now
- You will need to enter the farm settings (farm name, at least one XenApp server in the farm, and port if it's not the default value of 80)
- Please select the correct Published Resource Type for your farm, either Remote, or Streaming, or both
- Finish the site creation and initial configuration
2. Perform advanced configuration
- You can perform advanced configurations by right clicking the newly created site as well as config.xml under it

 - At site level, you can modify the farm settings (to add a new farm, for instance) and change DMZ settings as a usual site
- You can also configure the authentication methods. By default, Prompt and Pass-through are selected and Pass-through is the default authentication method. Especially, I will set "Allow users to save password" for Prompt method
- I usually configure "Manage shortcuts" on config.xml so that the Start Menu and Desktop shortcuts can be configured cleanly and removed when user logs off. This, of course, depends on your environment
3. Now you need to restart the web site in IIS admin for the changes to effect
4. Set up the client
- Install the XenApp Plugin
- Run the client named "Citrix XenApp", formerly known as "Program Neighborhood Agent"
- You will be prompted to enter the server address (of the config.xml file) as below. Update it and you will be able to connect to the site automatically (if Pass-through is set as the default authentication method), or user ID, password and domain (if Prompt is the default)
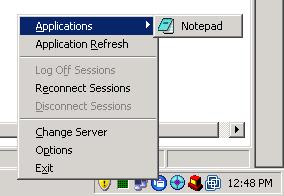
 - After the login and applications are refreshed, depending on your configurations of "Manage shortcuts" on config.xml, you now should access published applications from Start Menu, Desktop, or by right clicking the XenApp Plugin icon in the system tray
No comments:
Post a Comment